How to Fillet a Walleye
After a fantastic day on the water, reeling in a prized Ohio walleye is an incredible feeling. But then comes the moment of truth: turning that beautiful fish into delicious fillets. For many anglers, especially those new to processing their own catch, the thought of filleting can feel daunting, leading to wasted meat or uneven cuts. This guide is here to demystify the process, walking you through each step to confidently fillet your walleye, ensuring you get the most out of your hard-earned catch.
The Transformative Power of Learning to Fillet Your Own Walleye
There's a deep satisfaction that comes from catching a fish, but a truly veteran angler understands that the journey doesn't end until that fish is perfectly prepared for the table. Learning to fillet your own walleye isn't just about saving a few bucks at the fish cleaning station; it's about connecting with the entire angling process, from hook to plate.
Beyond the Catch: Why Filleting is the Ultimate Angler's Skill
Think about it: you put in the time, studied the Ohio Walleye Fishing Guide, mastered the techniques, and finally brought that prized walleye into the boat. To then hand it off to someone else to process can feel like giving away the final act of your accomplishment. When you fillet your own fish, you take ownership of the entire experience. It's a skill that builds confidence, deepens your understanding of the fish's anatomy, and frankly, it's just incredibly cool to be self-sufficient in that way. There's a certain pride in serving up fillets you processed yourself, knowing every step of care that went into them.
This isn't just about showing off, either. It’s about being a complete angler. Knowing how to efficiently and cleanly turn a whole fish into ready-to-cook portions is an invaluable part of the fishing lifestyle. It means you're not reliant on someone else's schedule or skill, giving you the freedom to fish when and where you want, and still enjoy the freshest possible meal afterward.
Maximizing Your Harvest and Minimizing Waste
One of the most frustrating things for new filletters is feeling like they've left a lot of good meat on the bones. It's a common struggle, and honestly, we've all been there! The good news is that with a bit of practice and the right technique, you can become incredibly efficient, ensuring that you're getting every possible ounce of delicious walleye from your catch. Commercial processors, while convenient, sometimes prioritize speed over yield, and you might not get as much meat as you could with careful home filleting.
By taking the time to learn the proper cuts, you'll find yourself wasting less and less. This translates directly into more meals for your family and friends from the same fish. Respecting the fish means utilizing as much of it as possible, and skilled filleting is a huge part of that. Plus, when you consider the cost of fresh walleye at the store, becoming proficient at filleting your own catch offers a real financial benefit over time, especially when you're adhering to Ohio Statewide Bag and Size Limits.
Achieving the Freshest, Best-Tasting Walleye Every Time
There's no substitute for freshness when it comes to fish. The moment you catch a walleye, the clock starts ticking on its quality. Being able to fillet your fish soon after catching it, especially if you've kept it properly chilled, means you're locking in that peak flavor and texture. No long delays waiting for a processing service, no questionable handling practices—just you, your fish, and a direct path to the frying pan.
The difference in taste between a fish filleted hours after being caught and one that sat on ice for a day or two, or went through multiple handling steps, is noticeable. By controlling the filleting process yourself, you ensure your walleye goes from the water to your table in its absolute prime, ready to deliver that delicate, flaky, sweet flavor that walleye are famous for. It's why many anglers agree that walleye are among the Best Eating Fish Caught in Ohio, and some even argue that Is Walleye the Best Tasting Fish in Ohio?. Ensuring that freshness is key to truly appreciating it.
Gearing Up: Essential Tools for a Clean Walleye Fillet
Before you even think about putting a knife to fish, you need to make sure you have the right arsenal of tools. Trying to fillet a walleye with a dull or inappropriate knife is like trying to drive a nail with a screwdriver – it's frustrating, ineffective, and potentially dangerous. Investing in a few key items will make the entire process smoother, safer, and yield much better results.
Choosing the Perfect Fillet Knife for Walleye
This is arguably the most critical tool in your filleting kit. A good fillet knife is designed specifically for separating meat from bone and skin, with a thin, flexible blade that allows for precise cuts. For walleye, which often range from an Average Size of a Lake Erie Walleye to larger specimens, a blade length between 6 and 9 inches is usually ideal.
- Blade Length: A 7-inch blade offers a good balance of reach for larger fish and control for smaller ones. Too short, and you'll struggle with long cuts; too long, and you might lose some dexterity.
- Flexibility: You want a blade that's flexible enough to follow the contours of the backbone and rib cage, but not so flimsy that it bends excessively or loses control. A medium-flex blade is a great starting point.
- Material: Stainless steel is common for its corrosion resistance. High-carbon stainless steel offers a good edge retention and is easy to sharpen.
- Sharpness: This cannot be stressed enough: a truly sharp knife is a safe knife. A dull knife requires more force, increasing the risk of slips and accidents. When you're ready to buy, you can find a huge selection on
Amazon, often with reviews that highlight how well they hold an edge. Look for brands known for quality blades.
The Indispensable Filleting Board and Other Basics
Your cutting surface is almost as important as your knife. A stable, non-slip cutting board will give you the confidence to make those precise cuts without worrying about your fish sliding around.
- Non-Slip Surface: Look for a board with rubber feet or a non-slip texture. If your board tends to slide, place a damp towel or a piece of non-slip mat underneath it. This stability is crucial for safety and efficiency.
- Size: Make sure your board is large enough to comfortably accommodate your walleye. You don't want the head or tail hanging off the edge, making it harder to position the fish.
- Cleanliness: Always start with a thoroughly clean board. After filleting, scrub it down with hot, soapy water and a mild bleach solution or dedicated cutting board sanitizer to prevent any cross-contamination.
- Plenty of Paper Towels: You'll use these to wipe your knife, wipe down the fish, and keep your hands clean. Keeping your hands and the knife clean of slime and scales will improve your grip and visibility.
- Scrap Bowl: Have a large bowl or bucket nearby specifically for the fish guts, head, and carcass. This keeps your workstation tidy and makes cleanup much easier.
Enhancing Your Filleting Experience with Smart Accessories
While the knife and board are the essentials, a few other items can significantly improve your filleting experience, especially as you gain confidence.
- Cut-Resistant Gloves: These are an excellent investment, particularly for beginners or those who fillet frequently. They won't make your hands completely invincible, but they offer a great layer of protection against accidental nicks and slips, especially on your non-dominant hand holding the fish. You can find various styles and materials on
Amazon. - Fish Scaler: While walleye scales are relatively fine and often come off with the skin during filleting, some prefer to quickly scale the fish first, especially if they plan to pan-fry a whole smaller fish or want to ensure a cleaner work surface. This is less critical for a true skin-off fillet, but it's an option.
- Honing Steel or Sharpener: Even the best knife will lose its razor edge with use. A honing steel helps maintain that edge between sharpenings, and a good sharpener is essential for restoring a truly dull blade. Learning to properly sharpen your knife is a game-changer.
- Boning Pliers: These small pliers are fantastic for grabbing and pulling out any stubborn pin bones that you might miss with your knife. They give you a much better grip than trying to use your fingers.
- Cooler with Ice: If you're filleting multiple fish, or if it's a warm day, keeping your fish chilled in a cooler of ice until it's their turn on the board helps maintain their freshness and firm up the flesh, making it easier to handle. This also applies to proper fish care after the catch, as discussed in How to Store Fish on a Hot Summer Day. Knowing your Best Ohio Fishing Gear and Tackle Guide includes these items will make your time more productive.
The Art of the Fillet: A Step-by-Step Walleye Masterclass
Alright, you've got your tools, your walleye is chilled, and you're ready to go. Don't let those YouTube videos of seasoned pros intimidate you; with a calm approach and these step-by-step instructions, you'll be filleting like a champ in no time. Remember, everyone starts somewhere, and practice truly makes perfect.
Prepping Your Prize: From Live Catch to Fillet-Ready
The preparation before the first cut is crucial for a clean, efficient filleting process. Take your time here.
- Keep Your Fish Cold: Ideally, your walleye should be kept on ice or in a livewell until you're ready to fillet it. Cold fish are firmer and easier to handle, resulting in cleaner cuts. A fish that's been out in the sun or left warm for too long will have softer flesh, which tears easily.
- A Quick Rinse: Before placing the fish on the cutting board, give it a quick rinse under cold water to remove any loose scales, slime, or debris. Pat it mostly dry with a paper towel. This helps with grip and keeps your board cleaner.
- Positioning the Fish: Lay the walleye flat on your cutting board, preferably with its head facing away from your dominant hand. If you're right-handed, the head should be to your left; if left-handed, to your right. This orientation gives you the best angle for the initial cuts.
Making the First Strategic Cuts
This is where the magic begins. These initial cuts set the stage for cleanly removing the fillet.
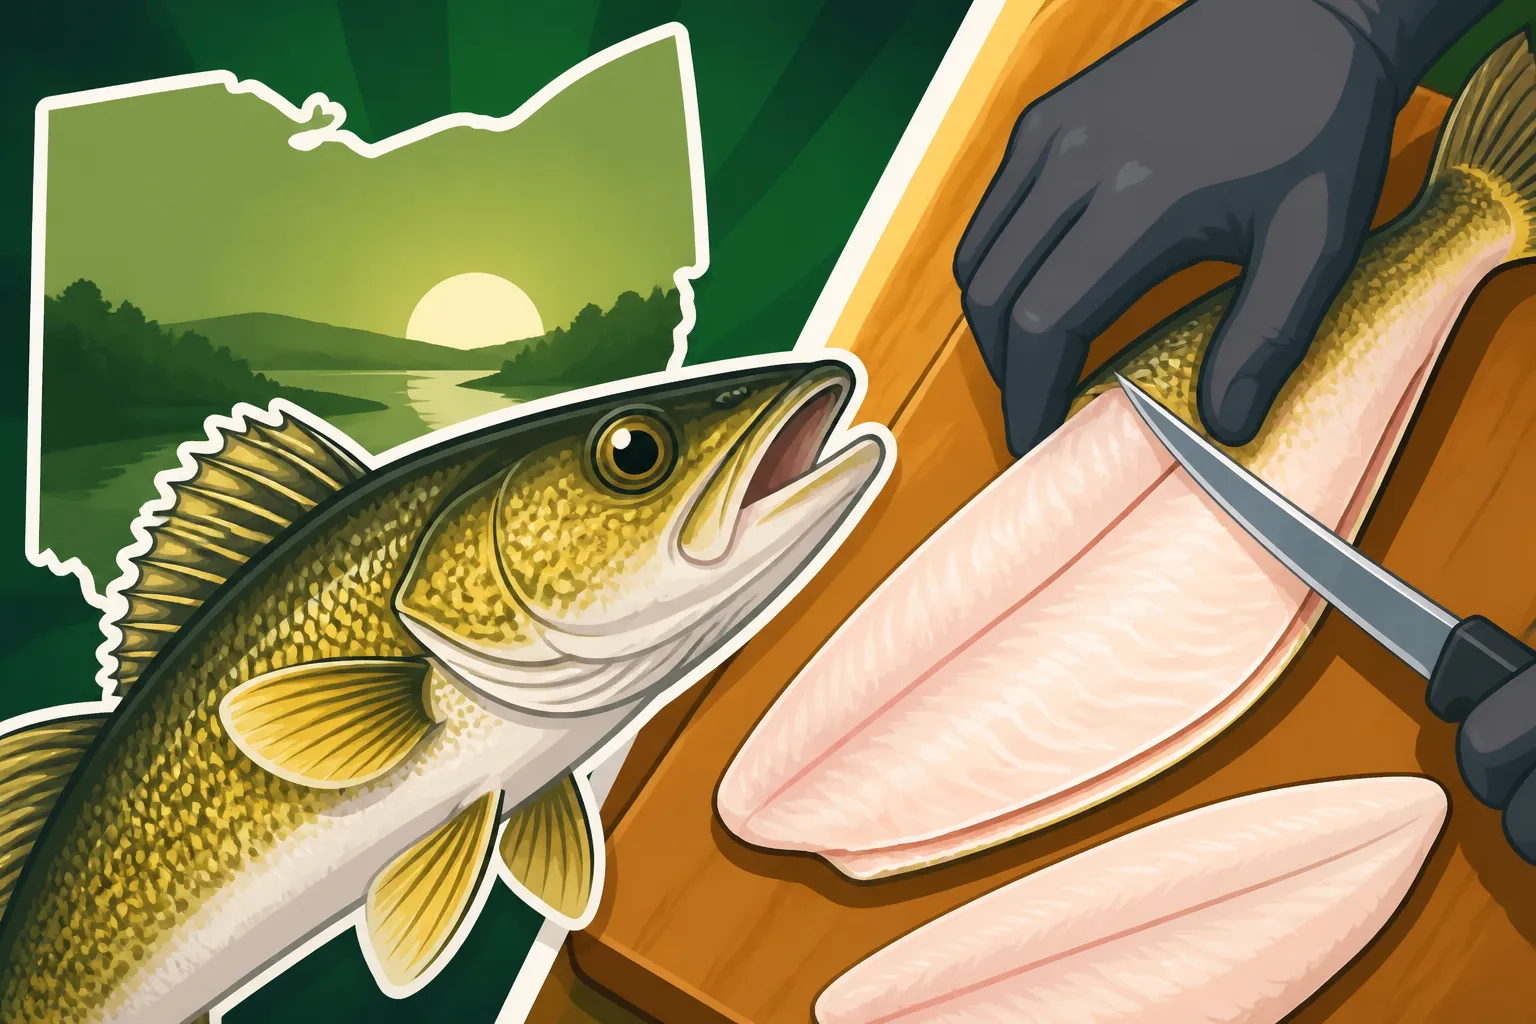
- Behind the Gill Plate: Hold the fish firmly with your non-dominant hand. With your fillet knife, make a clean, vertical cut directly behind the pectoral fin (the small fin just behind the gill plate) and just behind the gill cover. Cut all the way down until your knife hits the backbone. Don't cut through the backbone.
- Along the Backbone (Top Side): Now, with the tip of your knife still against the backbone at the top of that initial vertical cut, turn your blade so it's parallel to the backbone. Gently work your knife along the top of the backbone, using the bones as a guide. You're essentially "unzipping" the meat from the backbone, moving from the head end towards the tail. Keep the blade pressed against the spine as you go.
- Cutting Over the Ribs: As you approach the dorsal fin and get past the main body cavity, you'll feel the blade running over the top of the rib cage. Continue to cut towards the tail, keeping the knife slightly angled downwards, just above the ribs. You're aiming to detach the entire fillet from the backbone, but leave it attached at the tail for now. This technique is often easier than trying to cut around the ribs in the first pass.
Separating the Fillet and Dealing with the Rib Cage
Once you've made the cuts along the backbone, it's time to fully separate that first fillet.
- Detaching the Upper Fillet: With the fillet still attached at the tail, carefully lift it up. You'll see the rib cage exposed.
- Angling Along the Ribs: Now, slide your knife under the rib cage from the head end, angling your blade slightly upwards. Work your knife along the underside of the ribs, using the bones as your guide. Keep your knife shallow to avoid cutting into the ribs, but deep enough to separate all the meat. Take your time here, applying gentle pressure.
- Complete Separation: Once you've cut through the entire rib cage section, the fillet should be completely free, except for where it's still attached at the tail. Finish that final cut, and you'll have your first clean, skin-on walleye fillet. Set it aside and repeat the entire process on the other side of the fish.
The Smooth Glide: Skinning Your Walleye Fillet
Now that you have two skin-on fillets, it's time to remove the skin for that pristine, ready-to-cook piece of meat. This step might seem tricky, but it's incredibly satisfying when done correctly.
- Anchor the Tail: Lay one fillet skin-side down on your clean cutting board. Pinch the very end of the tail with your non-dominant hand, anchoring it firmly to the board.
- Initial Angle: With your fillet knife, make a small cut at the tail end, just through the flesh, until you hit the skin. Angle your blade slightly downwards, almost parallel to the board, but with the cutting edge barely touching the skin.
- The Glide: Apply gentle downward pressure to the knife (keeping it flat against the skin) and saw the knife back and forth, moving it away from the tail. At the same time, with your non-dominant hand, pull the skin towards you at a slight upward angle. The key is to let the knife do the work, maintaining that slight downward angle against the skin, while pulling the skin tightly.
- Clean Separation: With practice, the blade will smoothly separate the meat from the skin, leaving you with a beautiful, skinless walleye fillet. Repeat for the second fillet.
Pinpointing and Removing Pin Bones for a Boneless Treat
Even with the skin off, walleye fillets typically have a line of small "pin bones" running down the center of the fillet, close to where the lateral line was. These are soft, but nobody wants to bite into a bone.
- Feel for Them: Run your fingers gently along the length of the fillet. You'll feel a distinct line of small, flexible bones. For a smaller Ohio Muskie Size and Bag Limits fish, these might be harder to find.
- The "V" Cut Method: Most commonly, anglers make a small "V" shaped cut along each side of the pin bone line. You cut down, angle the knife, and lift out a thin strip of meat containing the bones. This is quick and effective, though it does remove a small amount of meat.
- Boning Pliers Method: Alternatively, if you have boning pliers, you can simply grip each pin bone individually and pull it out. This method preserves more meat but can be more time-consuming.
- Check Thoroughly: Always run your fingers over the fillet one last time to ensure all pin bones are gone.
Cleaning and Storing Your Fillets
You're almost there! Proper cleaning and storage ensure your hard work pays off with delicious meals later.
- Quick Rinse: Give your boneless, skinless fillets a final, quick rinse under cold water to remove any lingering scales or blood. Avoid soaking them, as this can diminish flavor and texture.
- Pat Dry: Immediately pat the fillets thoroughly dry with paper towels. Excess moisture can lead to freezer burn and a mushy texture when cooked.
- Storage:
- Short-Term (1-2 days): Place the dried fillets in an airtight container or a zip-top bag with as much air removed as possible. Store them in the coldest part of your refrigerator. A bed of ice under the container can also help maintain freshness.
- Long-Term (Freezing): For longer storage, vacuum sealing is the best option. If you don't have a vacuum sealer, wrap individual fillets tightly in plastic wrap, then in foil, and finally place them in a freezer bag. Remove as much air as possible. Label and date your packages. Properly frozen walleye can last for several months. For more detailed tips on handling fish after the catch, see How to Handle and Release an Ohio Muskie and How to Store Fish on a Hot Summer Day.
Troubleshooting Common Filleting Hurdles
Even with the best instructions, you're bound to encounter a few challenges as you learn. Don't get discouraged! These are normal learning curves, and every experienced angler has faced them.
Tackling Slippery Fish and Maintaining a Firm Grip
A fresh walleye, especially right out of the cooler, can be incredibly slippery. This is probably one of the biggest frustrations for new filletters.
- Use a Damp Towel: A simple trick is to place a damp paper towel or a clean kitchen towel under and over the fish. This provides extra friction without damaging the skin or flesh.
- Gloves for Grip: While cut-resistant gloves help with safety, some regular rubber or nitrile gloves can also improve your grip on the fish, making it less likely to slide while you're cutting.
- Technique Over Force: Instead of trying to clamp down on the fish, focus on the controlled movements of your knife. Let the sharp blade do the work, not brute force. A good, firm grip with your non-dominant hand is necessary, but don't white-knuckle it.
- Keep it Clean: Periodically wipe down your cutting board and the fish with paper towels to remove accumulating slime and scales. A clean surface is a less slippery surface.
The Frustration of Wasted Meat and How to Improve
It’s disheartening to look at a walleye carcass after filleting and see good meat left behind. This is a sign you're still learning, not that you're a bad angler!
- Blade Angle is Key: Most often, wasted meat comes from not keeping the knife blade tight against the backbone or angling it incorrectly over the rib cage. The bones are your guide; let them lead your knife. Practice pressing the blade gently against the spine and ribs.
- Practice, Practice, Practice: There's no substitute for repetition. The more fish you fillet, the better you'll get at feeling the bones and making those precise cuts. Start with smaller fish if you can, or don't worry about being perfect on your first few walleye.
- Watch Videos: Supplement this guide with visual aids. Watching experienced filletters can help you visualize the angles and movements. There are tons of great tutorials online.
- Don't Rush: Take your time, especially in the beginning. Speed comes with proficiency. Focusing on clean cuts will naturally lead to less waste. Remember that even a small amount of "wasted" meat is still good for making fish stock!
Keeping Your Edge: Knife Care and Sharpening
A dull knife is the enemy of efficient filleting. It makes the job harder, more dangerous, and results in ragged cuts.
- Sharpen Before Every Session: Make it a habit to give your fillet knife a few passes on a honing steel or a fine-grit sharpening stone before you start filleting. This keeps the edge crisp.
- Learn to Sharpen Properly: If your knife is truly dull, you'll need a more substantial sharpening. Invest in a good quality sharpening stone set, an electric sharpener, or even take it to a professional. There are many tutorials available on how to maintain the proper angle for your blade.
- Clean and Dry: After each use, wash your knife immediately with warm, soapy water and dry it thoroughly. Store it in a knife block, sheath, or magnetic strip to protect the edge from dulling and prevent accidents. This is just as important as choosing the right kind of fishing line like Choosing the Right Ohio Fishing Line for optimal performance.
- Safety First: A sharp knife glides through the fish with minimal effort, reducing the chance of slips and cuts. If you find yourself forcing the blade, it's time to sharpen.
| Fillet Knife Characteristic | Description | Ideal for Walleye | Benefits |
|---|---|---|---|
| Blade Length | The cutting edge from handle to tip. | 6-9 inches | Balance of reach for larger fish and control for precision. |
| Flexibility | How much the blade bends. | Medium-flex | Allows contouring around bones without being too flimsy. |
| Handle Material | Material of the grip (e.g., rubber, synthetic, wood). | Non-slip rubber or textured synthetic | Provides secure grip even when wet or slimy. |
| Blade Material | Type of steel used (e.g., stainless, high-carbon stainless). | High-carbon stainless steel | Corrosion resistance, good edge retention, easy to sharpen. |
| Sharpness | The keenness of the cutting edge. | Razor-sharp | Critical for clean cuts, safety, and reduced effort. |
Learning to fillet a walleye is a skill that will serve you well on every future fishing trip. It’s an extension of the angling experience, making you a more confident and self-sufficient outdoors enthusiast. With the right tools, a little patience, and plenty of practice, you'll be turning your fresh catches into perfect, ready-to-cook fillets in no time. Enjoy the delicious rewards of your hard work!
Disclaimer
This article is for general informational purposes only and does not constitute professional advice. Laws, prices and regulations vary by location and change over time. Consult a qualified professional for guidance on your specific situation.